Powered by Blogger.
Showing posts with label Appetizers and Snacks. Show all posts

May 23, 2019

Traditional Heirloom Recipes- Mom's Chicken Pickle!


This pickle is one of my mom's signature dishes, it is a classic and is soooo delicious, anyone who tastes it once always keeps asking for more! I have earlier blogged about the mutton version of this pickle too.

The pickle is spicy, sour and has a touch of Goan vindaloo style to it I think, it is full of flavor and is very good with paranthas, bread, rice or even on its own as a snack, it is actually my mom's secret recipe and it took a huge amount of coaxing and cajoling to get it out of her!

INGREDIENTS-


  • Boneless Chicken/Small sized Chicken pieces on the bone-1 kg

  • Garlic-3 and a 1/2 whole heads peeled and ground to a paste

  • Mustard oil-1 cup

  • Red chillies whole-5

  • Black cardamom-5

  • Cinnamon sticks-3

  • Cloves-7

  • Cumin seeds-2 tbsp+1 tsp

  • Cayenne pepper(deggi mirch)-1 tbsp

  • Vinegar-1/2 to 3/4 cup

  • Salt to taste

Method-

With a sharp knife chop boneless chicken into bite size pieces, Dry roast and grind all the dry masalas together except for red chillies, marinate mutton pieces in about half head of garlic and 1 tsp dry masala, leave for an hour.Now after an hour, heat oil in a pressure cooker add the cumin seeds and let crackle, next add the garlic paste, marinated mutton and all the rest of the ingredients except vinegar, dry roast the mutton for 5 minutes then close lid and give 4-5 whistles, let pressure drop by itself, DO not add any water.Open the lid and on medium flame dry roast the mutton, stirring all the time and adding vinegar little by little, till oil leaves sides of pan , add salt, keep frying till totally dry.

This pickle can be transferred to a clean container and will keep stored in the refrigerator for several weeks,IF it lasts that long!

Print Friendly and PDF Read more...

July 20, 2015

EASY CHEESY VEGGIE MACARONI~ for kids


Ingredients-
  • 1 cup macaroni
  • ½ cup mixed vegetables(carrots, beans, cauliflower, beans, corn)
  • 1 onion, chopped
  • 1 large tomato, pureed
  • Ginger and garlic chopped-1/2 tbsp
  • ½ cup milk
  • 1 tsp plain flour(maida)
  • Cheese spread- 4 tbsp
  • Oregano- 1 tbsp
  • Chilli flakes-acc  to taste
  • Black pepper-1/2 tsp
  • Salt to taste
  • Butter-2 tbsp


 Method-

    1. Boil macaroni in plenty of water in a heavy pan, till almost done, drain under running water, splash a bit of oil on top to keep from sticking to each other.
    2. Heat 1 tbsp butter in a pan on low heat and sauté onions till soft, add ginger garlic and then tomato puree, cook well till it starts leaving sides of the pan.
    3. Add the vegetables into pan along with ½ cup water and cook till veggies are tender.
    4. On the other side make the white sauce- heat a tbsp of butter and add flour, roast the flour over low heat for a minute or so, tip in the milk stirring continuously so that no lumps are formed.Let milk thicken, season with salt and pepper and keep aside.
    5. Once veggies are tender, add macaroni to it and toss well, season with salt, pepper n oregano.
    6. Take a serving dish and layer white sauce at the bottom, spread out the macaroni on it and spoon the cheese spread on top, garnish with chilli flakes.
    7. Cheese will melt in a minute.Serve hot with toasted garlic bread.

Print Friendly and PDF Read more...

March 15, 2014

HOLI SPECIAL!! DAHI BHALLA, CRISPY BESAN SEV, CAPE GOOSEBERRY JAM AND TIPS FOR A SAFE HOLI


 Here's wishing all my beautiful readers a colourful Holi!
We are moving towards warmer weather and the palate craves some spicy cooling foods along with Holi staples like Gujiya and Thandai. Gujiya we bought this year and I made the spicy stuff!!My mom loves Chaat and the likes on Holi and we usually make it every year.So here we go...

 DAHI~BHALLA(Dahi Vada/ Lentil dumplings in spicy yogurt)
FOR Detailed recipe just click HERE 

            AND CRISPY BESAN SEV
                      FOR Detailed recipe just click HERE

Also Cape Gooseberries are in season yet again and I made huge batches of my famous Cape Gooseberry Jam(Rasbhari Jam). For the recipe, just click right HERE
 

Print Friendly and PDF Read more...

February 22, 2014

SPICY BEAN BURRITOS WITH SALSA AND SOUR CREAM~ from a scratch!

An old time buddy and Fitness enthusiast Nitin who blogs here has been asking me to make these since long, sparking the fire to learn more about World cuisine, so today I got down to making these and the freshness, taste and health benefits of this handy snack took me by surprise!! This one is definitely going into lunchboxes, frozen for meals in a jiffy, as well as smaller versions  as party snacks….the creativity with these is simply endlesss!!!
Don’t be intimidated by the long list of ingredients, they are however quite simple to make with a little bit of prep, and quite resemble our very own Indian Kathi rolls.

What I got to know about them-
Burritos are a traditional food of Ciudad Juárez, a city in Mexico, where people buy them at restaurants and roadside stands, burritos are one of the most popular examples of Mexican cuisine outside of Mexico.
Varieties of Burritos- 
Breakfast burrito
The breakfast burrito, a variety of American breakfast, is composed of breakfast items wrapped inside a flour tortilla. This style was invented and popularized in several different regional American cuisines
 Smothered burrito(Wet burrito style)
A smothered (often called "wet" or enchilada style) burrito is smothered with a red chili sauce similar to enchilada sauce with melted shredded cheese on top.
A burrito bowl is not technically a burrito, as it consists of burrito fillings served without the tortilla, with the fillings placed in a bowl, and a layer of rice at the bottom.
A chimichanga is a deep-fried burrito popular in Southwestern and Tex-Mex cuisines, and in the Mexican states.

NOW LETS MAKE ‘EM!
For the tortillas-
  • 2 cups plain flour
  • ½ cup wholewheat flour
  • 1 tsp olive oil
  • Salt to taste
  • Warm water for kneading
For the filling-
  • 1 cup Haricot beans(rajma)/ Chickpeas (boiled and lightly mashed)
  • 1 red bell pepper
  • 1 yellow bell pepper
  • Spring onion greens- 1 cup sliced
  • Tomato-1 medium chopped
  • Ginger-garlic paste- 1 tsp.
  • Hot sauce- 2 tbsp
  • Jalapenos- ½ cup sliced
  • Tomato ketchup-1/2 cup
  • Corn kernels-1/2 cup
  • Olive oil- 1tsp
  • Juice of 1 lemon
  • Fresh chopped coriander leaves
 For the Salsa-
  • ½ cup sliced spring onions
  • ½ cup finely chopped tomatoes
  • 1 grated carrot
  • ½ cup shredded lettuce
  • Juice of 1 lemon
  • Coriander leaves chopped
  • Salt and pepper to taste
 For the Sour cream-
  • ½ cup fresh cream
  • Juice of 1 lemon
  • Salt and pepper to taste
 For finishing-
  • ½ cup Shredded cheese of choice
 METHOD-
Make the tortillas-
Combine flour, wholewheat flour, oil, salt and knead into a pliable dough with warm water.
Let the dough rest for 1 hour
Knead again and roll out into discs just like chapatis and of the same thickness, stack and keep warm

Make the filling-
Heat oil in a pan and add ginger-garlic paste, followed by onions, tomatoes, bell peppers, corn and the boiled beans, cook for 5-10 minutes till soft and dry.Add rest of ingredients and cook for a further 10 minutes. Keep aside to cool.Taste and adjust seasoning, at this point you can add more chopped green chillies if you like it hot!
Make the salsa-
In a large salad bowl combine all the ingredients for the salsa and toss wel, taste and adjust seasoning.
Make the sour cream-
Combine all the ingredients and mix well, keep aside.

FOR FINAL ASSEMBLY-
Take 1 tortilla and add 2-3 tbsp of the filling, layer with the salsa and sour cream, lastly shredded cheese, roll up and wrap in silver foil.
Eat them hot :-0

Print Friendly and PDF Read more...

January 30, 2014

DENSE, CHOCOLATEY OLIVE OIL BROWNIES

Dense, fudgy moreish and chocolatey!!!.. rich with the Mediterranean goodness of heart healthy olive oil...great for kids and adults alike. Though they are enriched with olive oil you cannot make out or miss the taste of butter at all.Both the walnuts and olive oil are rich sources of Omega 3..so go on...indulge :-)


 To make these luscious goodies..u need-
INGREDIENTS-

  • Dark Cooking chocolate- 100gms
  • Powdered sugar- 200gms
  • Plain flour(maida)- 140 gms
  • Eggs-3
  • Chocolate chips- 100gms
  • Chopped walnuts- 50gms
  • Vanilla essence- 1 tsp
  • Olive oil-1/2 cup
  • Pinch of baking powder
  • Pinch of salt

METHOD-

  1. Preheat oven at 180C.
  2. Grease and line a brownie tray/ Swiss roll tray or any large rectangular pan. It is very important to line it either with greaseproof sheet or foil otherwise brownies will stick to the pan.
  3. Break chocolate roughly into large chunks with a rolling pin and add olive oil, heat on low flame in a thick bottomed pan.
  4. Let chocolate melt completely but on low heat and then let the mixture cool down till warm to touch.
  5. Next break the eggs one by one into the melted chocolate mixture and combine well, now add the sugar and mix very well, it will turn into a jelly like mass.
  6. Add the flour, vanilla essence, baking powder, chocolate chips and salt and combine thoroughly.
  7. Pour into prepared pan and level, sprinkle walnuts on top.
  8. Bake at 180 C for 20-30 minutes. DO not over bake.

Print Friendly and PDF Read more...

August 18, 2013

PANEER SHASHLIK(LOW CAL AND FAT FREE)


A definite party pleaser and a tantalising snack especially if you have vegetarian guests coming over. Guilt free but full on taste and flavour, its colourful and light...must try!!!

Ingredients-
Cottage cheese(paneer)- 250 gms
Red and yellow Bell peppers (capsicum)- 1 each
Onion- 2 (chopped into largish bite size pcs)
Thick low fat Curd- 250gms
Ginger+garlic paste(fresh)- 1 tbsp
Garam masala- 1tsp
Lemon juice- 1 tsp
Finely chopped green chillies-1-2
Mint leaves- a handful, finely chopped
Coriander leaves- a handful, finely chopped
Salt and pepper to taste
Chaat masala to sprinkle on top
Wooden skewers(soaked in water so that they don’t burn)

Method-
  • Whip the curd well.
  • Add ginger+garlic paste, garam masala, lemon juice, green chillies, garam masala, coriander, mint and salt/pepper to the whipped curd.
  • Cut paneer into largish squares and marinate in the above mixture for 2 hours or overnight.
  • Cut onion and peppers into bite size pieces.
  • Final assembly-
  • Take a wooden skewer , alternately thread the onion then the marinated paneer, bell pepper, keep repeating, finishing with the onion in that order.
  • Grill/ Pan roast the skewers till brown and done.
  • Sprinkle chaat masala and serve hot.


Print Friendly and PDF Read more...

April 26, 2012

HEARTY POTATO KNISH~SMITTEN KITCHEN

 These have been playing in my mind ever since I came across them at Deb's and I mulled over all that carb overload the whole of Sunday evening and Monday morning before finally giving in to them!
These have to be the ultimate in comfort food and are really quite delicious warm or cold, the only change I made from the original recipe was to add a hint of garlic... since garlic makes everything taste better, doesn't it???.
Here's how u make 'em in Deb's own words and if you are really going to make them don't forget to read all about them here-
Yield: 6 3-inch hearty knish, though you can make them any size you please
Dough
2 1/2 cups all-purpose flour
1 teaspoon baking powder
1/2 teaspoon table salt
1 large egg
1/2 cup vegetable oil
1 teaspoon white vinegar
1/4 to 1/2 cup water
Filling
3 medium potatoes, boiled
2-3 cloves garlic, chopped
1 small onion, peeled and diced small
1 tablespoon vegetable or olive oil
1 tablespoon unsalted butter
1/2 teaspoon table salt
Freshly ground black pepper
To finish
1 large egg yolk
1 teaspoon water
Make dough: Stir together your dry ingredients in the bottom of a medium/large bowl. In a small bowl, whisk together the egg, oil, vinegar and water. Pour it over the dry ingredients and stir them to combine. Once the mixture is a craggy, uneven mass, knead it until smooth, about a minute. Place the dough back in the bowl and cover it with plastic wrap. Set it aside for an hour (or in the fridge, up to 3 days) until needed.
Meanwhile, prepare filling: Pressure cook potatoes. Drain, then transfer to a large bowl to cool.
Heat a large, heavy skillet over medium heat. Once hot, add butter and oil and once they’re fully melted and a bit sizzly, add onions and garlic and reduce to medium-low. Cook, stirring frequently, until deeply caramelized, which will take about 45 minutes. Can you do this in less time? Of course. But the flavor won’t be as intense. Transfer to bowl with potatoes and mash together until almost smooth. Stir in salt and many grinds of black pepper and set the filling aside.
Assemble knish: Line a large baking sheet with parchment paper and preheat your oven to 375 degrees.
If your dough has sweated some beads of oil while it rested, fear not, you can just knead it back into an even mass. Divide the dough in half. On a well-floured surface, roll the first half of the dough into a very thin sheet, roughly in the shape of a 1-foot square, but really, no need to be rigid about it. For moderate size knish (smaller than the traditional “doorstops” but still hefty, about 3 inches across), create a 2-inch thick log from half your potato filling across the bottom of your dough. Roll the filling up in the dough like you were rolling a cigarette (which, of course, we would never), but not too tight. A tiny amount of slack will keep the dough from opening in the oven. Keep rolling until the log has been wrapped twice in dough. Trim any unrolled length and add it to the second half of the dough; it can be used again. Repeat the process with the second half of your dough and second half of filling; you might have a small amount of dough leftover.
Trim the ends of the dough so that they’re even with the potato filling. Then, make indentations on the log every 3 to 3 1/2 inches (you’ll have about 3, if your log was 1 foot long) and twist the dough at these points, as if you were making sausage links. Snip the dough at each twist, then pinch one of the ends of each segment together to form a sealed knish base. Use the palm of your hand to flatten the knish a bit into a squat shape and from here, you can take one of two approaches to the top: You can pinch together the tops as you did the bottom to seal them; indenting them with a small dimple will help keep them from opening in the oven.
Bake knish: Arrange knish on prepared baking sheet so that they don’t touch. Whisk egg yolk and water together to form a glaze and brush it over the knish dough. Bake knish for about 45 minutes, rotating your tray if needed for them to bake into an even golden brown color.

Print Friendly and PDF Read more...

August 15, 2011

CHEESE AND ONION QUICHE


What is a Quiche??...an open pastry case, filled with a mixture of eggs, cream and other savoury (= not sweet) foods, which is baked and eaten hot or cold
pronounced as -/kÄ“SH/
This delicious flaky pastry shell filled creamy savoury treat is a perfect accompaniment to your evening Tea or Coffee.
Ingredients-
for the pastry  shell-
  •  Plain flour-175 gms
  • Salted butter-80 g
  • Chilled water- a couple of tbsp.
For the filling-
  • Milk-200 ml
  • Butter-1 tbsp
  • Onion-1 medium chopped
  • Heavy Cream-2 tbsp
  • Eggs-2
  • Cheese-1/2 cup grated
  • English mustard-1/2 tsp
  • Salt and black pepper to taste
For the pastry shell-
  • Sieve flour in a large bowl.
  • Rub in the butter till the mixture resembles fine breadcrumbs.
  • Add chilled water, a tbsp at a time till the whole thing comes together as a stiff dough.
  • Wrap in cling film and chill for 15 minutes.
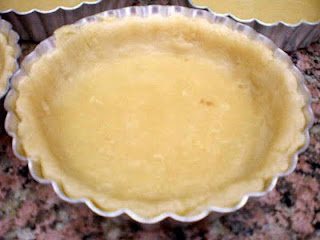
  • Gently unwrap and roll out pastry, grease and flour one large tart pan or 4 individual pans.
  • Fit out the pastry and trim edges, return to chill for another 15 minutes.
  • In the meantime preheat oven at 200 C, bake  the cases for 15 minutes and take out.
For the filling-
  • Heat butter gently, and  add onions, let sweat.Turn off heat when pink.
  • Add the rest of the ingredients to the cooled onions, reserving only a little egg white.
  • Brush pastry cases with the reserved egg white to seal in and prevent pastry from turning soggy.
  • Gently spoon in the filling in to the shells and bake for 20-30 minutes till filling is set.
  • Serve warm.

Print Friendly and PDF Read more...

August 3, 2010

SOME MEAN LEMON RICE (CHITRANNAM)!

Have you noticed the spicy NEW Indian look of "In love with food"??, thought of whipping up something that India holds dear to the heart, and guess came to mind?...yes! some Lemon rice or Chitrannam, sour, hot and real good.Husband takes a bite and fondly says, "Wow! That's some mean lemon rice!".

 To make this you require-(recipe from here)
  • 4 cups of freshly cooked rice.
  • 2 to 3 juicy lemons 
  • 6 to 8 green chillies,deseeded and slit
  • 1/4 cup Chana dal (soak for an hour)
  • 2 tbsp Urad dal
  • 1 teaspoon each salt and turmeric
  • 2 tbsp ghee
  • 12- 15 fresh curry leaves. 
  • Cumin seeds-1/2 tsp
  • Mustard seeds-1/2 tsp
  • 1 medium boiled potato
Method-
  1. Heat ghee in a pan and add the cumin, mustard and curry leaves, fry till sizzling.
  2. Add chana and urad dal as well as the potato and green chillies and cook till crisp and brown.
  3. Now add haldi and salt and cook for a few more minutes.,tip in the rice and give a good stir  lastly squeeze lemon juice on top and serve hot.
TIPS-
  • I prefer Basmati rice and cook it till just done, not mushy.The way to do this is to take rice in a large vessel and add plenty of water to it.Cook on medium flame for 15-20 minutes adding more water to keep rice submerged.Taste a grain or two for doneness.Drain well and leave on slow flame again to dry out any remaining moisture.You will get perfect rice like in a pulao.
  • Be careful while handling chillies.Been there, done that!, wear gloves.I find the amount of chillies little high for my preference so deseed them accordingly.
  • I use boiled/raw potato both depending upon what I have at hand, so can you.
  • Don't skip the curry leaves, they are very important.
  • To get this shape of rice press down hot rice in a bowl or katori with the back of a spoon, put a plate on top on which you would be serving and turn upside down, Voila!, you have the desired shape.Garnish with curry leaves and serve.
  • Cashewnuts and peanuts are also fried till golden and added for extra flavour.
  • The accompaniment of choice for Chitrannam is yogurt since it cools the palate, given that the rice is hot, spicy and tangy.


    Print Friendly and PDF Read more...

    July 14, 2010

    TENDER GRILLED CHICKEN PITA POCKETS WITH HUMMUS AND GREEN BEANS

    Lebanese style recipe- Pita bread with tender, juicy chunks of Chicken, makes for a complete meal and it is healthy to boot! Most of the prep work can be done a day ahead, then all it takes is last minute assembling and you have dinner on the table in minutes.
    Ingredients-
    • Pita bread- 4 (sliced in half to make 8 pita ‘pockets’)
    • Boneless chicken- 500 gms (cut up into bite sized pieces)
    • Ginger +garlic paste (fresh)- 1 tbsp
    • Fresh yogurt- 1 cup
    • Fresh French beans- 250 gms ( top and tail)
    • Salt and black pepper to taste
    • Grated cheese, sliced onions, tomatoes and lettuce- acc. to requirement
    • For the Hummus-
    • Boiled chickpeas-1 cup
    • Lemon juice- 2 tbsp
    • Garlic- 2 plump cloves (minced)
    • Tahini- 1 tbsp
    • Olive oil- 2 tbsp
    Method-
    In a large bowl combine the yogurt and ginger-garlic paste, toss in the Chicken pieces, add salt and pepper and mix to coat evenly.Leave for at least 2 hours.
    Pre heat griller and grill the chicken pieces for 20 minutes or till golden, keep warm.
    Boil or steam the green beans, sprinkle salt and pepper and keep warm.
    For the Hummus-
    Combine the Chickpeas, lemon juice, garlic and tahini and blend in a blender, add salt to taste.Dish out in a serving bowl, drizzle olive oil on top.
    To assemble and serve-
    Lightly roast pita and fill pockets with the tender chicken, lettuce and onions, top with grated cheese and grill for a further 10 minutes till cheese is golden and bubbling.
    Serve with the warm beans and Hummus.Enjoy!

    Print Friendly and PDF Read more...

    June 30, 2010

    RIDICULOUSLY EASY CHEESY PASTA

    Don't we all love easy, quick dinners?? I sure do, this is one such pasta recipe which is ready from scratch to the table very quickly!.. and is nutritious to boot...
    To make this ridiculously easy pasta you need-
    Ingredients-
    • Pasta of choice (I used tubes)-2 cups boiled till tender but not mushy, if you are a first timer, follow instructions here
    • Frozen mixed chopped veggies of choice(carrots, beans, broccoli, cauliflower)-1 cup (u can use fresh too)
    • Fat free/reduced fat mayonnaise-1/2 cup
    • Ready tomato puree-1/2 cup
    • Oregano-1/2 tsp
    • Garlic- minced-1/2 tsp
    • Sugar-1 tsp
    • Onion- 1 small diced
    • Olive oil- 1 tbsp
    • Grated cheese- 2-3 tbsp 
    • Salt and black pepper
    Method-
    1. Heat oil in a heavy bottomed pan, saute garlic and onion for a minute till fragrant.
    2. Add the tomato puree and fry till oil leaves sides of pan.
    3. Microwave the mixed veggies on high for 5 minutes till tender, or simmer in open pan till tender but still crunchy even upto 1 day before.
    4. Add the sugar and oregano to the tomato puree and mix well.
    5. Now add in the vegetables, the pasta and mayo along with salt and pepper, combine thoroughly and cook till heated through
    6. Sprinkle grated cheese (I skimped on the cheese but really you should not) on top and serve with toasted garlic bread.

    Print Friendly and PDF Read more...

    May 7, 2010

    CHEESY, MELTY CAPSICUM TOMATO PIZZA from a scratch!

    I am always amazed and awed when baking with yeast, I think it is the most satisfying of all my baking experiences.The aroma of fresh pizza baking in the oven is unparalleled and makes everyone's tummy growl.You can only imagine how difficult it was to keep the wolves at bay while I clicked photographs :)
    Baking the pizza base is so easy and effortless and the results are delightful, crisp on the outside yet tender bread inside, the toppings can be altered according to preference.
    makes 3 large pizzas
    for the pizza base-

    • Flour-315 gms
    • Fresh yeast-2 teaspoons
    • Warm water-180 ml
    • Salt-1 teaspoon
    • Olive oil-2 tbsp
    • Sugar-1 tsp
    for the topping-
    • Sliced tomatoes-2
    • Sliced capsicum-2
    • Sliced onion- 1 large
    • Oregano
    • Tomato ketchup
    • Pizza cheese
    1. Method-Sieve flour in a large bowl, add oil and salt.In another bowl pour in warm water, add sugar and yeast , leave for a few minutes, knead a dough with this warm water, yeast mixture till a smooth, silky result is achieved.
    2. Leave in an oiled bowl covered with cling film for an hour.
    3. To assemble- roll out dough into discs and leave on baking tray or half an hour, bake this base for 15-20 minutes till just beginning to colour, remove and spread ketchup as well as other toppings as desired, top with grated cheese and oregano, bake in a hot oven till cheese has melted and sides of the pizza are golden.Enjoy!

    Print Friendly and PDF Read more...

    May 2, 2010

    CELEBRATING MY 200th POST WITH TENDER BUTTERMILK SCONES!


    "I am happy and grateful that this is my 200th post and I hope to continue to post more in the coming days, months and years...I will not say that I never knew where time flies, I felt every moment of it, yes, everytime I cooked, baked, fried, everytime I created a setting for the perfect photo and everytime I sat down to write a post, I felt every minute of it...that is why there is so much of me all over these pages..."
    Scones are an integral and traditional part of an English Tea though they are of Scottish origin, these tender, buttery bite-sized treats are delicious with clotted cream and jam.Buttermilk scones are salty and can be enjoyed split and simply buttered, with cream cheese spread, with jam or even on their own, dunked in a cup of sweet Tea.
    The recipe below is from my favorite book-Complete baking by Martha Day
    To make these you require-
    makes 15
    Ingredients-

    • Plain flour-200gms
    • Salt-1 teaspoon
    • Baking powder-1 teaspoon
    • Bicarbonate of Soda-1/2 tsp
    • Cold butter-4 tablespoon
    • Buttermilk-175ml
    Method-
    1. Preheat oven to 220C.Grease a baking sheet.
    2. Sift the dry ingredients into a bowl.Rub in the butter with your fingertips till it resembles fine breadcrumbs.
    3. Gradually pour in buttermilk, stirring with a fork to form a soft dough.
    4. Roll out doug to 1/2 inch thickness and stamp out rounds with a 2-inch biscuit cutter.
    5. Place on prepared baking sheet and bakeuntil golden, 12-15 minutes.Serve warm or at room temp.
    I ate three of these in one go, one fresh out of the oven, soft and meltingly tender, on it's own, the second warm and slathered with butter, mmm... and the third buttered and spread thickly with marmalade...delicious!

    Print Friendly and PDF Read more...

    March 19, 2010

    DOUBLE PROTEIN BESAN CHEELAS WITH SWISS CHARD

    WISHING YOU ALL VERY HAPPY NAVRATRAS!

    I totally disliked besan cheelas as a child, reason being mom used to make tasteless big blobs of cheelas, seemingly uncooked in spots and serve them for breakfast, they used to kill my appetite on the spot....Don't get me wrong, my mom cooks up some superb fare but sadly for some things she completely succeeded in putting them off for life for me.
    Until I recreated and re tasted these...
    Now first let me explain what cheelas or pooras are, they are thin pancakes or crepe like, primarily made of besan(chickpea flour) to which a variety of seasonings and fillings can be added.In this recipe I have combined the benefit of Bengal gram with chickpea flour crepes and swiss chard plucked fresh from my garden.I suppose this recipe is good for Vegans and all those following the South beach diet and looking for a new recipe.


    INGREDIENTS-

    • FOR THE PANCAKES
    • Chickpea flour(besan)-1/2 cup
    • Ginger+garlic paste-1/2 tspGreen chillies chopped-1
    • Coriander- few leaves, chopped
    • Salt and pepper to taste
    • Ajwain seeds-1/4 tsp
    FOR THE FILLING
    • Bengal gram(chana dal)-1/2 cup
    • Ginger+garlic paste-1/2 tsp
    • Swiss chard-1/2 bunch (substitute with spinach if unavailable)
    • Salt and pepper to taste
    • Turmeric-1/4 tsp
    • Garam masala-1/2 tsp
    METHOD-
    1. Prepare the filling first-Combine half of the swiss chard and the chana dal well as the rest of the ingredients listed under filling.
    2. Add about 1/2 cup-3/4 cup water and give 5-6 whistles in the pressure cooker or till Bengal gram is tender, dry up any remaining water by keeping on low flame, keep aside.
    3. In a large bowl combine all the ingredients for the cheelas or crepes, add just enough water to make a pancake like consistency.
    4. In a nonstick pan smear very little oil and spread out the batter like dosas, cook till brown on both sides, make pancakes like this out of all the batter.
    TO ASSEMBLE-
    Take a cheela and spread out the chana dal mixture on it, layer with some more fresh Swiss chard, roll up, cut and serve with mint chutney and tomato ketchup.Enjoy!

    Print Friendly and PDF Read more...

    March 11, 2010

    MUSHROOM PAKORAS

    As the first Dahlia blooms in my garden I know Spring has finally arrived, the days are lovely sunny and warm and my soul which had been hibernating in the cold Winter's has now put forth fresh new leaves like the grape vine in my backyard, and I feel a new life has been infused into me.
    Today at the farmer's market we came across some very fresh mushrooms and instantly I knew I had to buy them for my husband's absolute favorite- Mushroom pakoras, for Vegetarian's they pack a surprise since they taste almost like fish pakoras and are really irresistible.
    The recipe is an old favorite and the blend of mushrooms with garlic and a light sprinkling of ajwain gives these pakoras a gorgeous flavor and taste.
    Try these,they are really lovely...
    Ingredients-

    • Fresh mushrooms-250 gms
    • Fresh garlic cloves (crushed)-6-7
    • Vinegar-2 tbsp
    • Ajwain-1/4 tsp
    • Turmeric-1/4 tsp
    • Chickpea flour(besan)-1/2 cup
    • Refined oil for deep frying
    • Salt and red chilli powder to taste.
    Method
    • Wash and cut mushrooms into bite size pieces.
    • Combine besan with all the other ingredients and add just enough water to make a thick batter consistency.


    • In a large bowl combine mushrooms with the batter and adjust salt, mix well to ensure each piece is coated.
    • Heat oil for deep frying, drop in the mushroom pieces into hot oil, fry till golden and crisp.
    • Drain on kitchen towels
    • Serve hot with tomato ketchup.Super party food!

    Print Friendly and PDF Read more...

    February 14, 2010

    TOMATO SOUP ON VALENTINE'S DAY??


    Some are baking heart shaped chocolate cakes, some are cooking up elaborate meals for their beloved but I am stirring up a simple pot of Soup b'cause that is what my husband loves the most!, and this is not your regular tomato soup but a strong, nutritious blend of the most healthy veggies and also the most appetizing and digestive herbs so after 5 bowlfuls and a very satisfied look on his face I know Valentine's day is going to be great!!
    To make this soup you need-
    Tomatoes-1 kg
    Carrots-2
    Amala-1
    Beetroot-1 small piece
    Mint- 1 large handful, with stalks
    Coriander- 1 large handful, with stalks
    Ginger- 1 small piece
    Black peppercorns-4-5
    Cloves-4-5
    Green chilli-1
    Black cardamom-2
    Sugar-4-5 tsp
    Salt and black pepper
    for garnishing if desired
    Fresh cottage cheese (grated)
    Bread Croutons
    Fresh cream
    Method-In a pressure cooker,combine all the ingredients except those reserved for the garnish, add 4 cups water and give 5-6 whistles, strain and season, serve piping hot with any or all the above garnishes.
    And heyy you know what, just to keep looking at everything that reminds you that today is Valentines day, I have downloaded the most amazing Valentine Wallpapers, you can too- just click here. Enjoy your day!- the wallpapers and soup too!! :)

    Print Friendly and PDF Read more...

    January 20, 2010

    A WINTER TREAT-CRISP ALU TIKKIS!

    Ever since I started cooking myself, the appeal of buying/ordering food from the market has been vastly reduced, I see so many things like pastries, burgers, pizzas, fastfood and want to buy them, but hey wait!I can make all of this myself, and you bet it will be fresher, tastier, healthier and at a fraction of the cost!
    So yesterday evening I saw this roadside vendor making tikkis and was tempted to have them, but on second thoughts, What oil is he using?, Are his hands clean?Is the way of making hygienic?, so I skipped buying them from the roadside vendor came home and prepared them fresh and piping hot instead and boy! was I glad, the entire family loved them and asked for second and third helpings!I was really satisfied that I had opted for something fresh and home made instead of the junk they serve outside.
    Here's how I made these delicious, crispy crust tikkis which are such a popular roadside snack here in India, I have on purpose abstained from adding any cornstarch/flour, and just let the tikkis be in their purest form :).You too will love them once you start making them yourself and I promise you will never eat/buy from the market.To make these you require-
    • Potatoes-6 large
    • Onion-1 large, finely chopped
    • Green chilli-1 large, deseeded and finely chopped
    • Green coriander- a handful, chopped
    • Salt and red chilli powder to taste
    • Garam masala-1 tsp
    • Tender, fresh ginger-1/2 tsp finely chopped
    • Oil for shallow frying.
    Method-Boil potatoes in the pressure cooker(give 3-4 whistles), peel and mash thoroughly with a fork whilst hot.Combine all the other ingredients and mash up well, let the mixture cool.Shape into tikkis/cutlets and fry in hot oil on medium heat till crisp and golden.Serve piping hot with tomato ketchup.

    Print Friendly and PDF Read more...

    December 12, 2009

    TANGY PINEAPPLE RASAM

    pineapple rasam.JPG


    This tangy sweet and sour marriage of pineapple and lentils is literally mouthwatering and digestive too, I did read up a few recipes before attempting this and what I understand is that not everyone uses arhar dal for this recipe, but I wanted something which could give it a more substantial base, this absolutely perfect and irresistible appetizer was loved by everyone and I think is definitely on my favorites list too. To make this you require-


    • Fresh pineapple-1 cup, diced fine

    • Arhar/ Toor dal- 1/4 cup

    • Mustard seeds-1/2 tsp

    • Cumin seeds-1/2 tsp

    • Curry leaves- a few

    • Asafoetida- 1/4 tsp

    • Sugar-2 tsp

    • Fresh ginger- grated 1/4 tsp

    • Oil-1 tbsp

    • Green chilli-1 deseeded and chopped fine


    Pressure cook lentils/dal (5-6 whistles), till done and mash well, Heat 1 tbsp oil in a pan and add cumin, mustard seeds, curry leaf, green chilli, asafoetida and ginger, let sputter, add the pineapple and dal and let simmer on gentle heat, lastly add sugar and salt, adjust to taste, serve piping hot.


    pineapple rasam1.JPG


    I know a lot of you love pineapple rasam and for some it is a childhood favorite, did your mom make it this way too??

    Print Friendly and PDF Read more...

    November 17, 2009

    MEXICAN TACOS FOR VEGETARIANS...made from a scratch!

    tacos.JPG


    Much of my food choices and preferences are influenced by what I liked and disliked as a child, though as a grown up, now I love certain foods which I detested earlier, but I find myself craving for stuff I had sampled as a child and liked, it attaches a certain sentimental value to the whole cooking process.We were a bunch of happy, hungry kids and there was never a dull moment in the house, there was this certain sense of security that you can have only as a child, that your parents are there to take care of everything :).Now when I think back of any place as home it is of that house in Dehradun, with a large mango tree and a lush bougainvillea canopy in the verandah, and that time when we were careless kids and would dance with gay abandon.It is in this same house that my love for food was born and some of my best childhood memories center around Black forest cake (my mom made on her wedding anniversary ) with a very messed up cream piping and a fallen souffle...


    Mexican Tacos was a two letter food word we read in the books, as kids we were really excited that mom, who was taking cookery lessons at that time had learned how to make these and would be trying them out, they turned out so good and we gorged on them, so the memory stayed and today after years I made them from what I remembered, for my new family, another place another time so far away yet so near my childhood ...


    Ready made taco shells are yet to hit the Indian market so I made mine from a scratch, once you get all the ingredients ready these tacos are really easy to just assemble and serve, in fact guests can also just do it themselves, to make these you need-


    • for the taco shells-1/2 cup flour

    • 1/2 cup corn flour (makki ka atta, this is not the fine white cornflour but a pale yellow coarser flour)

    • salt to taste

    • Oil-1 tbsp

    • Refined oil for deep frying

    • for the bean filling- 1 cup cooked kidney beans (rajma) or baked beans

    • Cottage cheese/ cheddar- grated according to liking

    • for the salsa-Spring/green onions- 1/2 cup

    • Tomato- desseded and chopped- 1 large

    • Green chilli- desseded and chopped- 1

    • Lemon juice- 1 tbsp

    • Shredded cabbage- 1/2 cup

    • for taco seasoning-Mix together 1 tsp chilli powder, 1/4 tsp ground cumin pwdr, 1/4 tsp oregano, 1/4 tsp chilli flakes, salt and black pepper in a bowl and keep aside.


    To make shells- Combine the flours, oil and salt and knead into a pliable dough, heat oil in a kadhai on medium heat.Roll out small balls of dough, if the edges are jagged, cut out with a katori or a small plate into a perfect round, fold into half or a semicircle and lower into oil, with the help of a slotted spoon keep the ends slightly open to stuff in the filling ...don't worry once you make 1 or 2 you will get the hang of it.Fry all the shells like this, drain and keep aside.If you are using leftover cooked rajma, dry them out completely, same with baked beans and keep them warm.Combine all the ingredients for salsa.To assemble-Take a crisp taco shell, layer gently with dried beans, then cheese then salsa, ending with more cheese, lastly sprinkle taco seasoning, as little or as much as you like and enjoy, serve immediately as they lose their crispiness on keeping.Guests can assemble their own shells as per their liking, these can me made 2-3 hours ahead of time and asembled at a minute's notice.I know that the real deal is different but I made them keeping my family's tastes in mind, believe me they turned out superb and everyone simply loved them!In fact now I know why they are Mexico's favorite street food!


    tacos1.JPG

    Print Friendly and PDF Read more...
    Related Posts with Thumbnails

    Back to TOP   

    } catch(err) {}